Home renovation projects often involve updating or replacing flooring, but before new floors can be installed, the old ones must go. Floor removal is a crucial step in the renovation process, and it requires careful planning, proper tools, and a good understanding of the techniques involved.
It’s important to note that floor removal can be physically demanding and time-consuming. Depending on the size of your space and the type of flooring you’re dealing with, it might take anywhere from a few hours to several days to complete the job. You should almost always get a professional (like Tear It Up Floor Removal) to do this for you. Factors like the age of your home, the condition of the subfloor, and any unexpected issues that arise during the process can all impact the timeline and difficulty of the project.
The Basics of Floor Removal
Before we dive into specific types of flooring, let’s cover some universal principles that apply to all floor removal projects:
- Safety First: Always wear protective gear including safety glasses, a dust mask, gloves, and knee pads.
- Prep Work: Clear the room of furniture and remove baseboards and trim carefully if you plan to reuse them.
- Tool Time: Gather necessary tools like a circular saw, pry bar, mallet, nail claw, and shop vacuum.
- Dust Control: Cover vents and doorways with plastic sheeting to contain dust.
- Disposal Plan: Set up a dumpster or disposal method for the old flooring.
Now, let’s break down the removal process for different flooring types.
Hardwood Floor Removal: The Classic Challenge
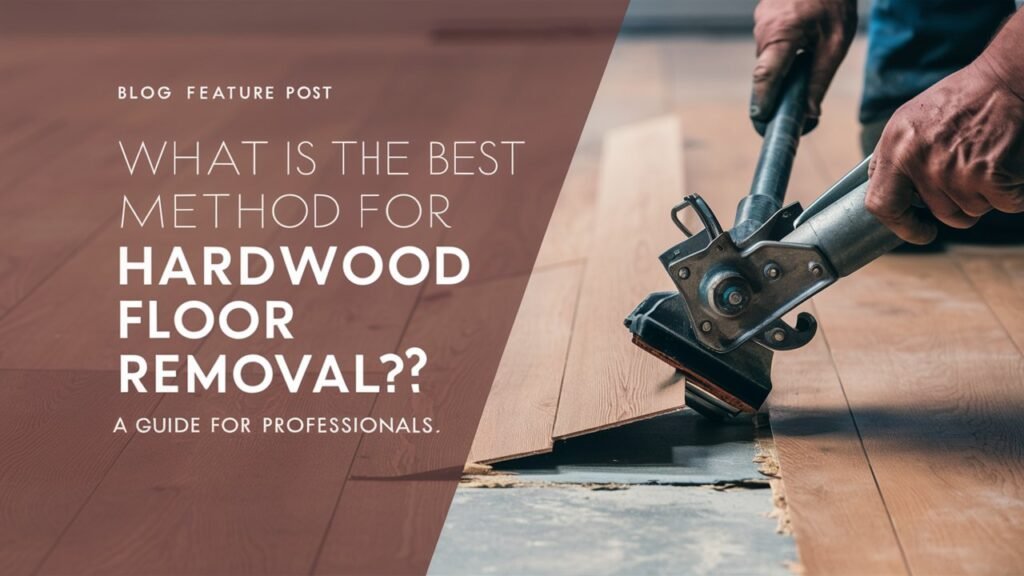
Hardwood floor removal is often considered one of the more difficult flooring materials to tackle. Here are the most effective methods stated by professionals.
-
Cut and Pry Method:
-
- Use a circular saw to cut the flooring into 1-2 foot wide strips perpendicular to the plank direction.
- Set the blade depth slightly less than the flooring thickness to avoid subfloor damage.
- Use a pry bar and mallet to lift cut sections, starting from the groove side.
- Remove remaining nails or staples from the subfloor.
Read More Articles: The Rise of Digital Marketing: Why Partnering with a Local Agency Matters
-
Plank-by-Plank Removal:
-
-
- Ideal for salvaging wood or more careful removal.
- Start at a corner or edge, using a pry bar to carefully lift individual planks.
- Work slowly down each row, taking care not to splinter or crack the wood.
- Remove nails as you go.
-
-
Power Tool Removal:
-
- For stubborn flooring, use an oscillating multi-tool with a wood/metal blade to cut through nails between planks.
- Consider renting a floor scraper machine for glued-down flooring.
- An air compressor with a pneumatic floor scraper attachment works well for nailed floors.
Vinyl Floor Removal: Peeling Away the Layers
Vinyl floor removal can be tricky, especially if it’s glued down. Here’s how to approach it:
- Start at a Corner:
- Use a utility knife to score a corner of the vinyl.
- Grip the loose edge with pliers and start pulling up.
- Heat and Scrape:
- For stubborn adhesive, use a heat gun to soften it.
- Follow with a floor scraper to remove the vinyl and adhesive.
- Chemical Removal:
- For extremely tough adhesive, apply a commercial adhesive remover.
- Follow product instructions carefully and ensure proper ventilation.
Bathroom Floor Removal: Navigating a Tight Space
Bathroom floor removal presents unique challenges due to fixtures and potential water damage:
- Remove Fixtures:
- Start by removing the toilet, sink pedestal, and any other removable fixtures.
- Check for Water Damage:
- Inspect the subfloor for signs of water damage or rot.
- Address any issues before proceeding with the new flooring installation.
- Small Space Techniques:
- Use hand tools rather than power tools in tight spaces.
- Work carefully around pipes and other bathroom-specific elements.
Tips for Successful Floor Removal
Regardless of the flooring type, keep these tips in mind:
- Work in small sections to avoid overwhelming yourself.
- Take frequent breaks, as floor removal is physically demanding.
- Consider renting specialized tools for large jobs.
- Salvage good materials if possible for reuse or recycling.
- Check for asbestos in older homes before disturbing flooring.
Read More Articles: Case Studies: Success Stories from Leading Marketing Agencies in Lahore
When to Call in the Pros
Not a lot of floor removal projects can be DIY. Most of the time it’s best to hire professionals. However, consider professional help especially if:
- You have a very large area to remove.
- The flooring is glued down and particularly stubborn.
- You want to salvage the flooring material.
- There are complications like water damage or rotting subfloor.
- You have physical limitations that make the work difficult.
Professional removal typically costs $2-$4 per square foot but can save you time and potential mistakes.
Wrapping It Up
Floor removal, whether it’s hardwood, vinyl, basement, or bathroom, is a challenging but manageable task with the right approach.
The professionals always follow these methods and tips (on a more expert level) to effectively remove your old flooring while minimizing damage and maximizing efficiency. Whatever you do, remember to always prioritize safety and proper tool use throughout the process.
To get the job done in the best way possible, call Tear It Up Floor Removal and see the difference for yourself!


